A Flap Over Sanding - Pt 1
04 22 2015
 In previous blogs we talked about how "sandpaper" is not just sheets and disks; that got me thinking about the 1" wide rolls, and how they can be used to solve finishing issues around the shop.

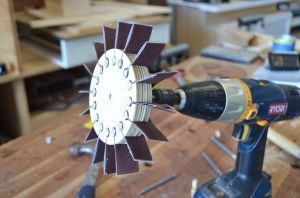
Having just finished our series on making custom profile sanding tools, I came up with the flap sander shown here. It works with hex shank quick-change adapters for the drill, is simple and inexpensive to make, and the flaps can be changed out quickly when needed.
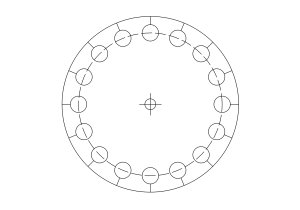
The body is a 4 inch disk of 3/4" plywood, cut out on the drill press using a circle cutter. This allows for making the disk whatever size wanted with a 1/4" hole perfectly centered on the circle. A second circle is scribed 3/8" in from the perimeter and the circle is divided into 22.5 degree segments as shown.
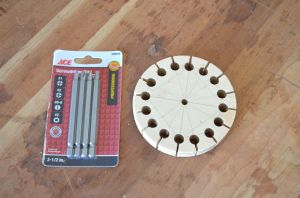
Sixteen 3/8" diameter through holes are drilled as the anchor points for the sanding strips, and then slots are cut from the perimeter to the center of each hole at the band saw. These slots need to be just wide enough for two layers of the roll material.

A set of inexpensive hex-shank driver bits from the hardware store provide the mandrel that connects to the drill. The Phillips point is ground off and the shaft pressed (read hammered) into the center hole of the disk.
Several different concepts were attempted for securing the strips of sanding material into the hub before hitting on an idea that was both simple and easy. We will cover that in Part 2 of this project. Meanwhile, you can order your roll sandpaper now and it will be in your hands when you are ready to complete your flap sander!
Please feel free to share your thoughts with us. We want to hear what you think about these projects we do, clever hacks you want to share, or whatever is on your mind. And if you like these blogs, be sure to share them with friends and co-workers!

