Sanding Big Projects with a Lathe Drum Sander
Posted by Ralph Bagnall on 04 07 2019

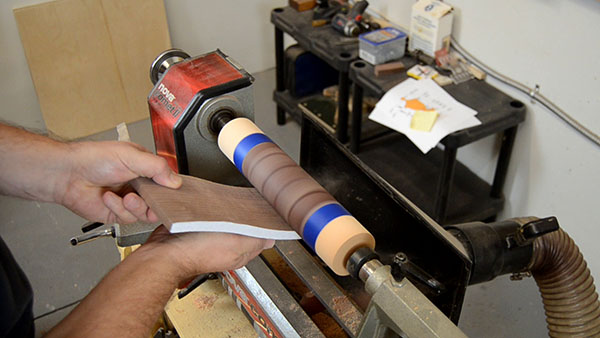
A recent project in our shop required “S” curved drawer fronts about 4” wide. After cutting the shapes on the band saw, they needed to be formed and smoothed but were too wide for typical sanding drums, so we decided to put our lathe to the task.
To start off, we turned a block of pine into a 2-1/2” cylinder about 12” long. In this case, the dimensions aren’t critical; the turned block just needs to be large enough that it won’t flex under load. Once the cylinder was turned, we wrapped a strip of 1” wide Cloth Backed Sanding Roll in a spiral around the cylinder, creating a makeshift sanding drum.

As this is a temporary setup, no complex holding system is needed, so we adjusted the sanding roll to wrap around the pine without overlapping itself, and then secured the end in place with a couple turns of masking tape. We wrapped the rest of the working area and taped the other end in place as well.

With the lathe on, we sanded the drawer fronts to shape and then sanded them smooth in short order.
 Cloth
Backed Sanding Rolls are available in grits from 60 to 400 and
the lathe RPM can be controlled so the setup can be tailored to the task at
hand.
This is a fast and easy method for creating a temporary drum sander larger than most of us have available. Because it is relatively small, the pine drum can be stored easily until the next project that requires it.
A word to the wise: Good dust collection is highly recommended - the sanding process with this lathe drum sander is fast!

