Make a Custom Profile Sanding Block
Posted by The 2Sand.com Team on 07 19 2019
Sanding molding or any regular contour can be a time-consuming and labor-intensive chore, especially if you have many linear feet to cover. To save time (and labor) as well as improving the consistency of the sanding job, we like to create a custom profile sanding block using sandpaper and auto body filler. Yes, you read that correctly, auto body filler.
Creating the Profile
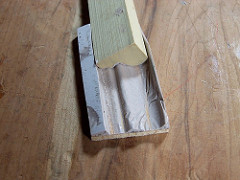
First, take a small piece of ¼ inch plywood (wide enough to more than accommodate your molding profile and at least 3 inches long) and place a generous amount of auto body filler on top of it. Next, place a layer of kitchen plastic wrap across the filler and press a segment of your molding into it. Once you are sure the entire profile is cleanly pressed into the auto body filler, set it aside, still resting on the molding, until it is fully hardened.

Trim the Excess
Now that the auto body filler is hardened, peel away the plastic wrap, trim any excess filler from the edges, and trim the block to size if necessary.
Adding Sandpaper
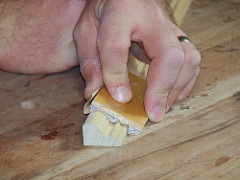
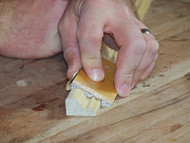
Prepare your sandpaper to easily contour to the molding block by gently rolling the sandpaper to break down the backer and make it more flexible. Once your sandpaper is ready, place it between your molding and the sanding block and start sanding!

You can make just one sanding block and switch sandpaper grits as you refine your finish, or create several blocks and bond sandpaper to the block. This is highly useful when used with a stroke-type detail sander.
Happy sanding!

