
Building the Torsion Box
02 06 2012
We have been working on our Downdraft Sanding Center for some time now, and this week we finally get to the heart of the system, the torsion box work top.
A torsion box is essentually built like an airplane wing: Ribs provide the internal structure and the addition of relatively thin skins to the faces creates a very strong but lightweight box. The fact that the core of the torsion box is mostly air space makes it ideal as a downdraft sanding table with a few modifications to the internal ribs.
Begin with the base. I cut it from 3/4" ply, 24 inches wide and 36 inches long. I then spent a bit of time laying out the rib locations on the face. This allowed me to space them correctly, and see how many ribs were needed. I laid the ribs out for approximately 6" spacing on center. With the outside faces, the spacing was not exactly 6" which is why I did the layout first.
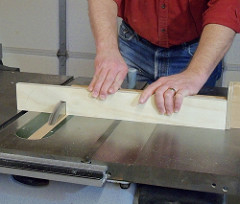
I ripped several strips of the same ply 4" wide, then crosscut them to length. The long sides were 36", but the long internal ribs were about 1 1/2" shorter. I left the stop set at 36" and used two scraps of the same ply so the center ribs would be exactly right since we know that the ply is not really 3/4" thick. The shorter cross ribs are all the same, but while the ends remained 4" wide, the rest were ripped down to 3" wide to create openings for air circulation in use.
I used the layout on the base to mark the locations of half lap cuts in the ribs. I marked one edge of each rib to keep orientation the same. Otherwise, any minor difference can warp the finished box. The dado was set up in my saw and all the half laps cut.
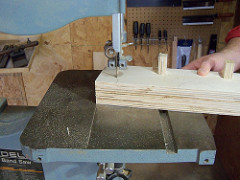 When you dry fit the ribs you will see that air can pass under the short cross ribs, but the long ribs divide the box into three sections. Holes could be drilled to allow for the airflow, but that could leave dust trapped in the box where it would be hard to remove. So I stacked the three long ribs together and cut semi circles in the bottom edge between the half laps. You can see in the dry fit photo that the airflow will now reach all sections, and dust can flow out.
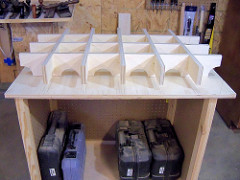
With the ribs dry fit as shown AND the sides clamped in place to insure the proper fit, I marked where the long ribs sat on the base and drilled pilot holes through for screws. I glued and screwed the ribs in place, then glued and nailed the sides and ends in place as well. If your halp laps are cut well, everything should be very flat across the top. If not, sand it all flat before adding the top.
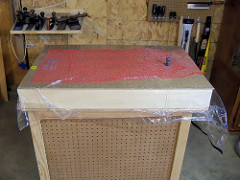
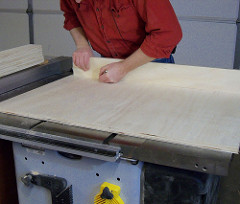
Finally, the pegboard top was cut to size and glued to the top of the assembled box. I used my vacuum bag to clamp it in place, but stacking weights on the top would work too. If you vacuum clamp your box, USE LIGHT PRESSURE. Too much vacuum can force the top down between the ribs or even crush it entirely.
Next time we will mount the dust port, attach the doors and hang the various sanding supplies on the cabinet.
I certainly invite you to add your thoughts or send along ideas that have worked well for you. Please feel free to add your comments here on the blog, on our Facebook page, or via Twitter. Let us know what you think! -2Sand.com