
Building a Better Sanding Block
12 10 2018
Sanding blocks come in all sorts of shapes, sizes and materials. In past issues of this blog we have shown methods for making custom sanding blocks from auto body filler, packing foam, and a deck of playing cards. One type we have seen used in most every shop consists of a wood block inside a sanding belt.
Typically, these sanding blocks are pretty crude: just one or two pieces of wood cut to fit inside the belt with some sort of wedge pressed in to tighten the fit. We have made and used them, but they rarely work as well as desired. The primary problem stems from the ability to maintain a tight fit.
Belts tend to vary slightly in size and will stretch with use, which is why all belt sanders have spring-loaded tensioning devices. Ideally, a block to fit inside a sanding belt would also have a tensioning system, and in building our Better Block Sander, we will show you how to create your own tensioning system using inexpensive materials.
Our Better Block Sander starts with a piece of 3/4" plywood or MDF, ripped to the width of the belt and cross cut to be about 1/2" shorter than the inside of the belt. One end of the piece of wood is bevel cut at 1/2" deep and 1-1/2” long. The block is then cut in half to accept the tensioning system.
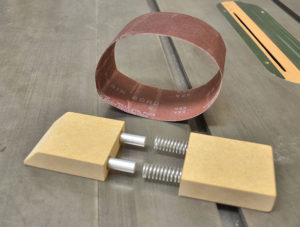
 This design uses 3/8" aluminum rods and a pair of springs to keep the sanding belt under tension. The rods keep the block halves aligned and the springs apply the necessary tension.
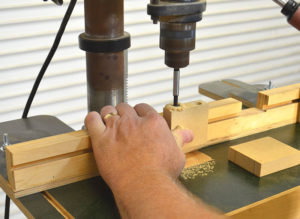
Start by marking the block halves on the mating faces just cut, and drill two 1/2" diameter holes 1/2” deep in each face. This step is really the only one that requires any accuracy; you need to ensure that the holes line up as precisely as possible.
Once the 1/2" holes are drilled, a 3/8" bit is used to drill 1-1/2” deep holes centered on the 1/2" ones, creating 3/8" holes with 1/2" counter bores.
Purchase a length of 3/8" aluminum rod and a pair of 2” long, 1/2” diameter springs at the hardware store. Cut two 3-1/2” long sections of rod, then scuff sand one end of each section and epoxy the scuffed end into one of the block halves. The other end remains free to slide in and out of the block to allow for tensioning the belt.
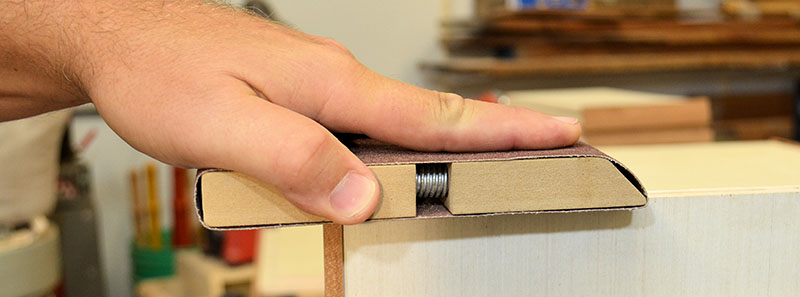
 Once the epoxy is cured, place the springs over the rods, slide the two block halves together, compress it and place the sander belt over the block. When released, the springs keep the block tight against the inside of the belt during use. (photo: BB Sander Install)
We use sanding blocks like this for all sorts of basic tasks around the shop, especially for flush-sanding parts, easing edges, and removing burrs. Although one block can be swapped out easily with different grit belts, they are cheap and easy to make, so it makes sense to create a dedicated block for each grit you use.

This is just one more way to get more from the sanding supplies you have around your shop. We’d love to see the sanding solutions you have devised for your shop!. Feel free to tell us about your brainchild here, or reach out to us on our Facebook page or on Twitter.
Happy sanding!