
5 Sandpaper Hacks for Spring Gardening
04 18 2016
Spring is finally here, and with the warmer weather my mind turns to gardening. Early spring is a prime time to get your tools ready and your seedlings started – and on their way to the beautiful plants you will enjoy this summer. So what better tool is there to get your spring gardening going than sandpaper? Yes, that’s right, sandpaper. Here are my five favorite sandpaper-inspired spring gardening hacks:
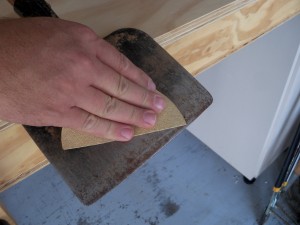 Remove rust from tools. If you’re anything like me, you probably have a few tools that are showing a bit of rust after sitting all winter. Not to worry - I find that 80-grit sandpaper is coarse enough to remove a light coat of rust from tools like spades, hoes and trowels. Just work methodically from the center toward the edges, using light pressure until the rust is gone. If you have a heavier amount of rust to remove, you may need to use a wire brush before applying sandpaper. And don’t forget to protect the cleaned tool buy rubbing it with a light machine oil when you are done.
Remove burrs from clipper blades. Disassemble the clippers so that the blades can be worked separately. Secure a piece of 320-grit sandpaper to your work surface then place the back side of one clipper blade against the sandpaper and work in a circular motion until all burrs are removed; repeat with the second blade. Wipe clean, apply a light machine oil and reassemble.
Revive handles. This one may seem a bit obvious, but it’s often overlooked. A few minutes spent sanding splinters and peeling paint from handles can make them much more comfortable – and safe – to use. Remember to protect any bare wood when you are done!
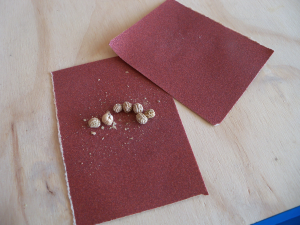
Give seeds a head start. Some seeds, like nasturtiums, peas, and beans, have a thick coating that makes them harder to germinate. One method of speeding up germination is a process called scarification, and sandpaper is an excellent tool for this. Simply put 6-10 seeds on a piece of sandpaper and place a second piece on top. Then rub the seeds between the two pieces of sandpaper for a few seconds. Now your seeds are ready to be planted!
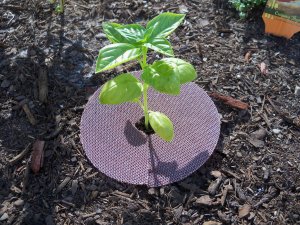 Protect your babies! Slugs are a bane in any garden, but they are especially dangerous to tender new plants and shoots. Slugs have tender bellies and won’t crawl across sandpaper, so it’s a great slug deterrent! The easiest way to do this is to create a collar of sandpaper by cutting a slit to the center of an orbital sander disc. Slide the collar over the plant stem and say goodbye to slugs eating your baby plants!
The great thing about each of these tips is that they can all be done with USED sandpaper. Yup – you don’t have to dip into your stash of the good stuff – just save up your old sandpaper and get one more use out of it. It’s good for the environment – and your garden too!
I hope you find these garden sandpaper hacks as useful as I do. Please reach out with comments below or on Facebook. Don't forget to follow us on Twitter and subscribe to our YouTube Channel too!