Sanding Belt Block Sander Part 2
07 14 2015

Ok, so I am still not sure exactly what to call this thing, but that won't stop us from completing the project. In the last blog we chose the sanding belt we wanted to use for our block sander, and created the basic block to fit within the sanding belt. Now we need to create a tensioning system to insure that the block stays tight and straight even when the sanding belts may be slightly different lengths and as they stretch.

I made one of these blocks some years back using a pair of long screws to set the tension. It worked ok, but I had to adjust the screws for each sanding belt I used, and if the belt stretched, the screws had to be adjusted again. This time I wanted a self-tensioning system. So at the hardware store I bought a length of 3/8" aluminum rod and a pair of 1/2" by 2" springs. I carefully marked and drilled two 1/2" holes in both of the sanding block ends, about 1/2" deep. These pockets will hold the springs in place. I then drilled a 3/8" diameter hole 2" deep in the center of each of these pockets. The 3/8" aluminum rods align the block halves while the springs provide the tension. I scuff sanded one end of each section of rod and epoxied them into one of the block halves. The other end remains free to slide in and out of the block to allow for different sanding belt sizes.

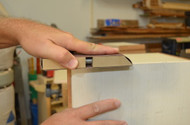
Once the epoxy is cured, the springs are placed over the rods, the two block halves slid together, then compressed, and the belt sander belt is placed over the block. When released, the springs will keep the block tight inside the sanding belt during use. I use sanding blocks like this for all sorts of basic sanding tasks around the shop, especially for flush sanding parts and easing edges. One of these blocks can be used with several different grits of sanding belts, but they are cheap and easy enough to make one for each grit you typically use.
This is but one more way to get more from the sanding supplies you have around your shop. We would love to see your solutions to odd sanding issues that you have come up with in your work. Feel free to comment here on the blog, on our Facebook page, or via Twitter. -2Sand.com

